Choosing the right extension
All available Joomla extensions are hosted in a central repository, called the Joomla! Extensions Directory (or JED for short), which is a little bit like an app store for all things Joomla.
Within the JED you’ll find a list of all Joomla! extensions, both free or paid. Many extensions feature both a free and paid version, which differ in terms of the features available. Paid extensions are purchased online – either as a one-off payment, or by subscription.
Once you’ve chosen an extension you’ll first download it to your local computer as a ZIP file, then upload and install this ZIP file within your Joomla site.
Installing the extension on your site
The process of installing a Joomla extension is pretty straightforward. There are a few different ways of doing so. Let’s start by opening the Install page within the Joomla backend, then we’ll take a look at the options available to us.
- Log into your site’s backend
- Click on Extensions -> Install
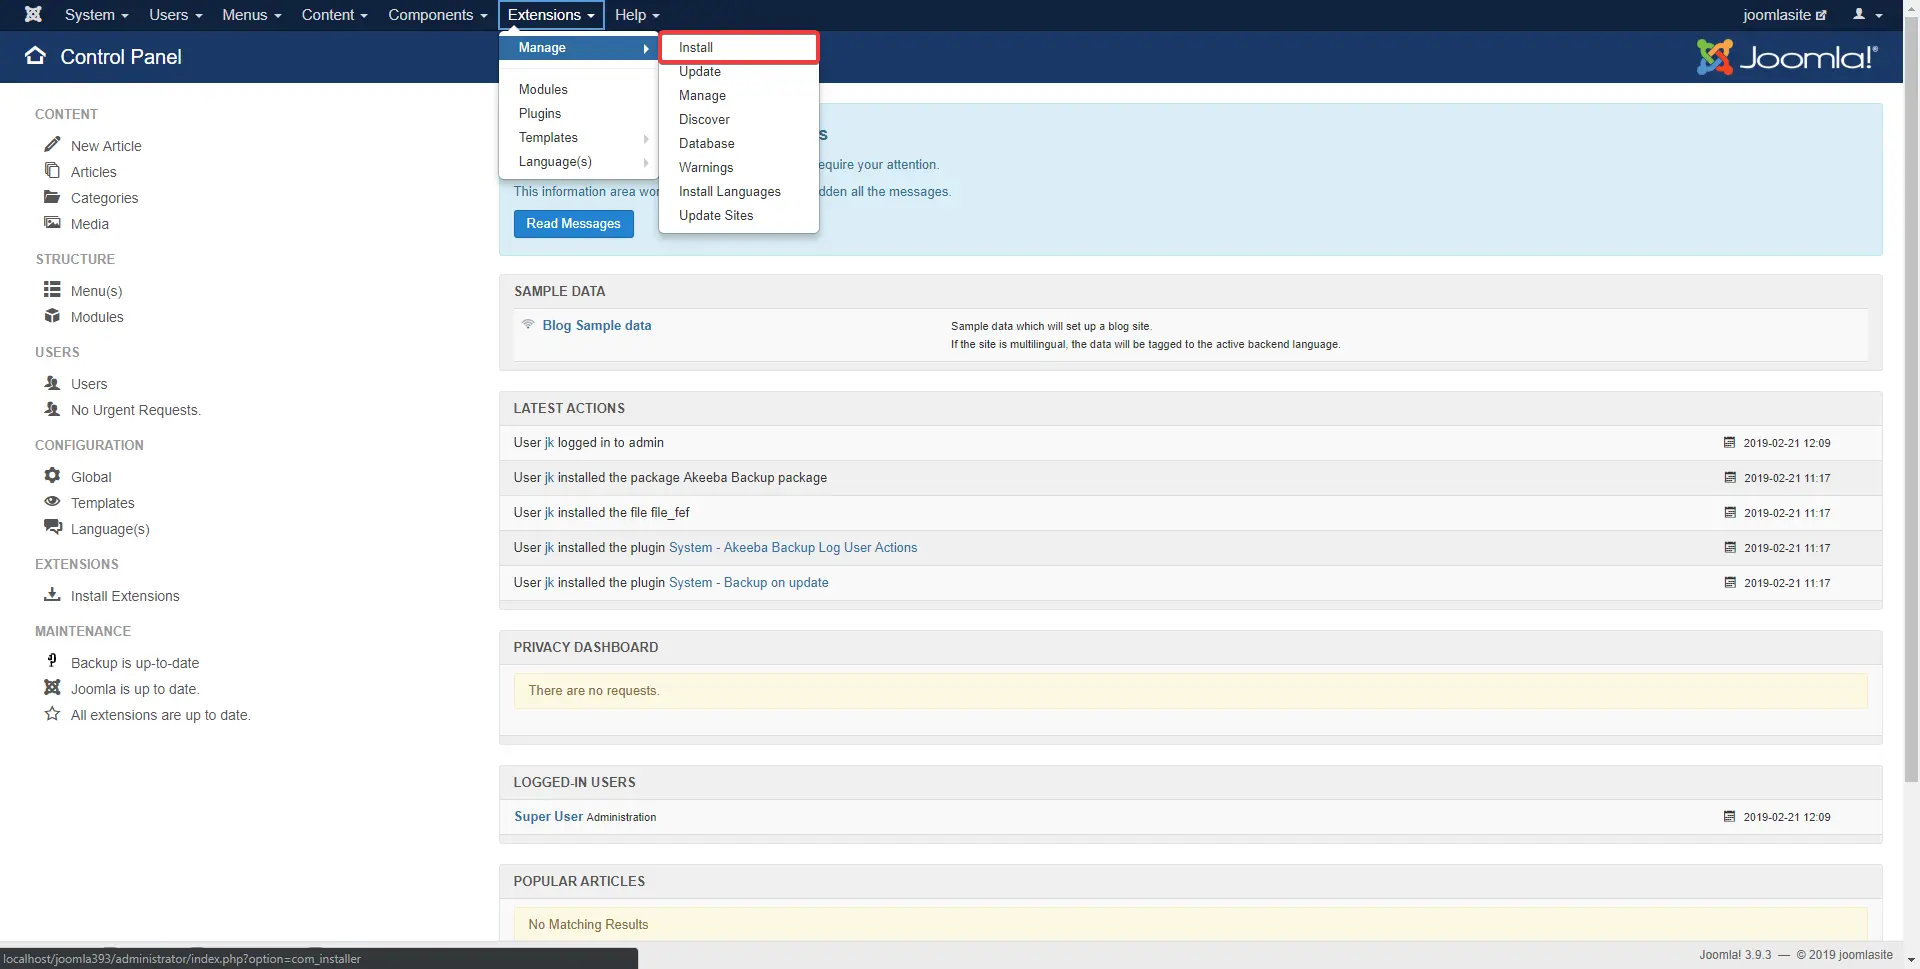
Now that we’re on the Install page, let’s take a look at the various methods for installing extensions:
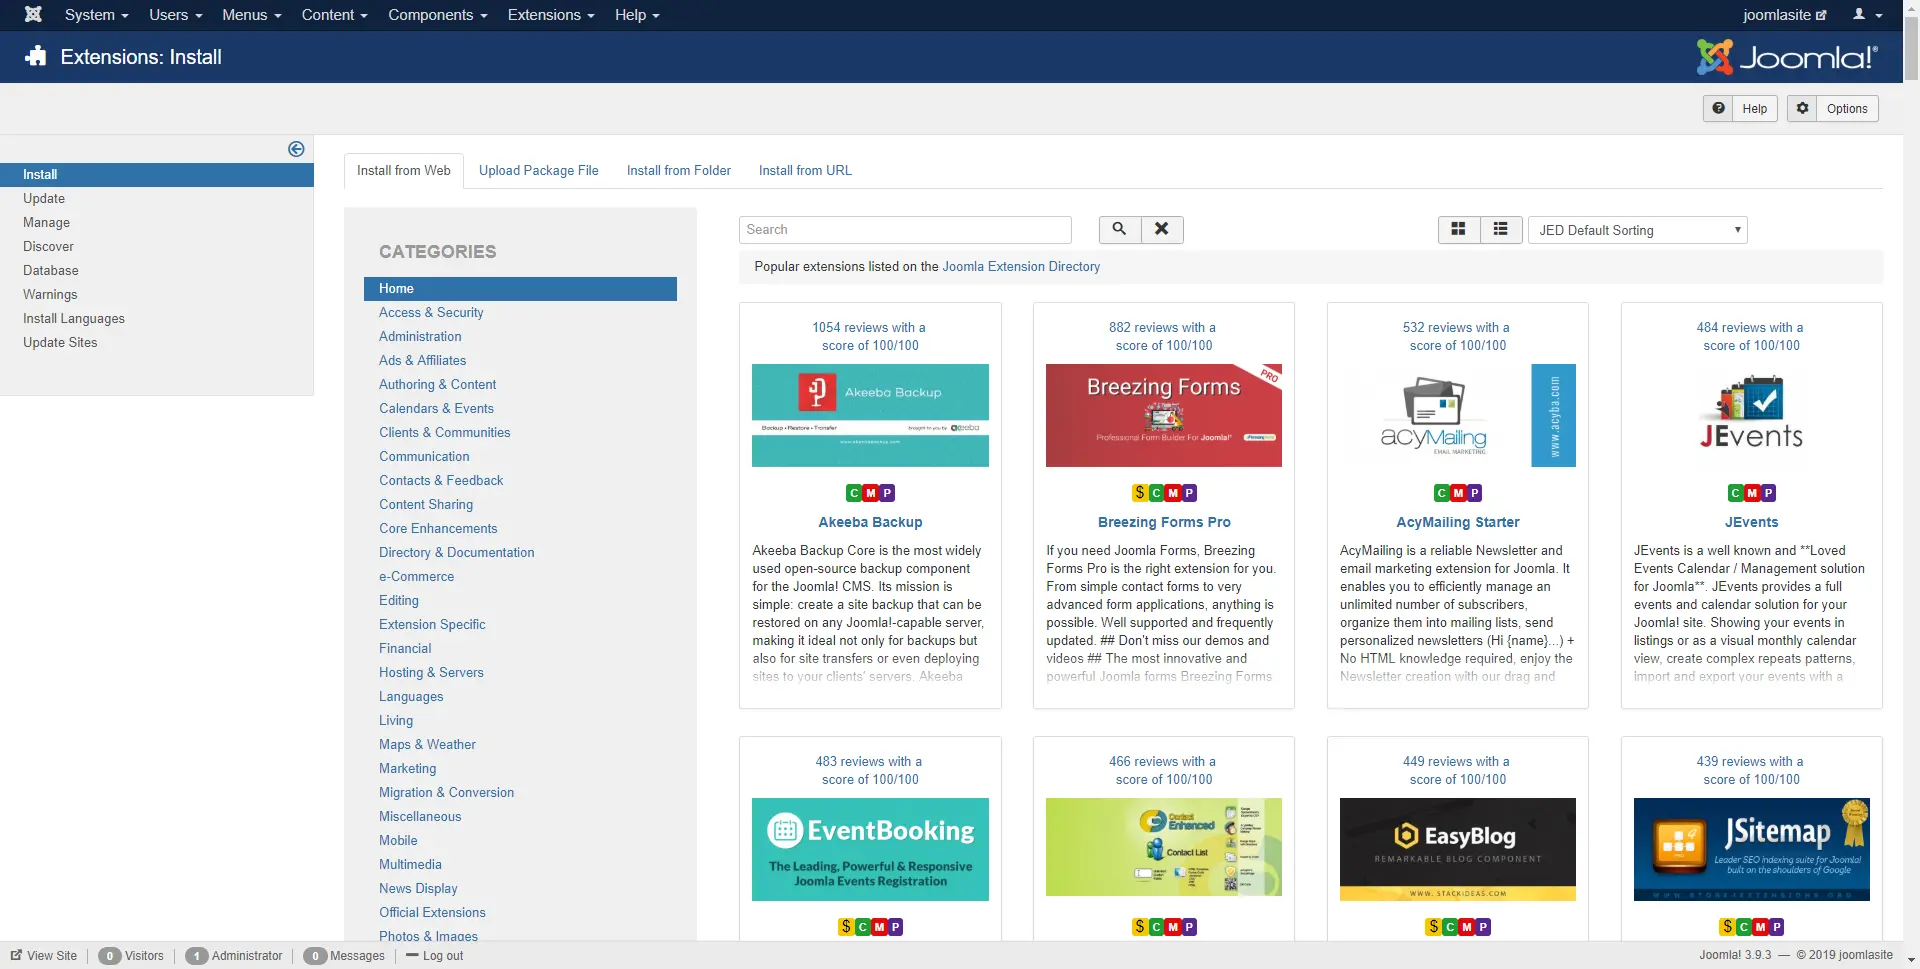
Install from Web
- Use the search field to search within the Joomla Extension Directory
- Choose the extension and click on the green Install button
- The installation is automatic and should take about 30-60 seconds
Upload Package File
- Download your extension from an external site – most often from the website of the developer
- The file you download will be in ZIP format
- Click on Browse for file and select your downloaded extension
- The installation is automatic and should take about 30-60 seconds
Install from Folder
- Download your extension from an external site – most often from the website of the developer
- Upload the extension to a folder on your web server (for help with that read our article about using an FTP client)
- In the Install from folder field, enter the location of the uploaded extension
- Click the Check and Install button
- The installation is automatic and should take about 30-60 seconds
Install from a URL
- Paste the URL of your desired extension in the Install from URL field
- Click the Check and Install button
- The installation is automatic and should take about 30-60 seconds
Extension installed … now what?
Once you’ve successfully installed the extension, you should be able to find it easily within the Joomla backend. If you installed a component you should find a new link within the Components menu.
If you’re not sure how to proceed, we recommend at this point that you take a look at the documentation provided by the developers of the extension for further information.