Choosing a method to build our form
One of the many reasons we love to work with Joomla is it’s modularity and customizability.
There are a vast number of extensions available with which you can greatly extend your website, and no matter the challenge you’re facing, typically there are a variety of equally valid approaches you can take.
Forms are no exception: there are several common methods for building a form in Joomla. Today, we’ll be working with the extension called RSForm! Pro.
Installing RSForm on your site
After downloading RSForm! Pro, go ahead and install it on your Joomla site. This should only take a minute.
Installing RSForm on your site
After downloading RSForm! Pro, go ahead and install it on your Joomla site. This should only take a minute.
If you have any troubles downloading and installing RSForm! Pro, check out our article on How to find & install a Joomla extension.
Okay, so we’re ready! You’ve installed the extension and you’re almost unbearably excited about building your first ever form.
Creating a form with RSForm! Pro
Let’s fire up RSForm! Pro for the first time. You can access it by logging in to the administrator section of your site and navigating to Components -> RSForm! Pro.
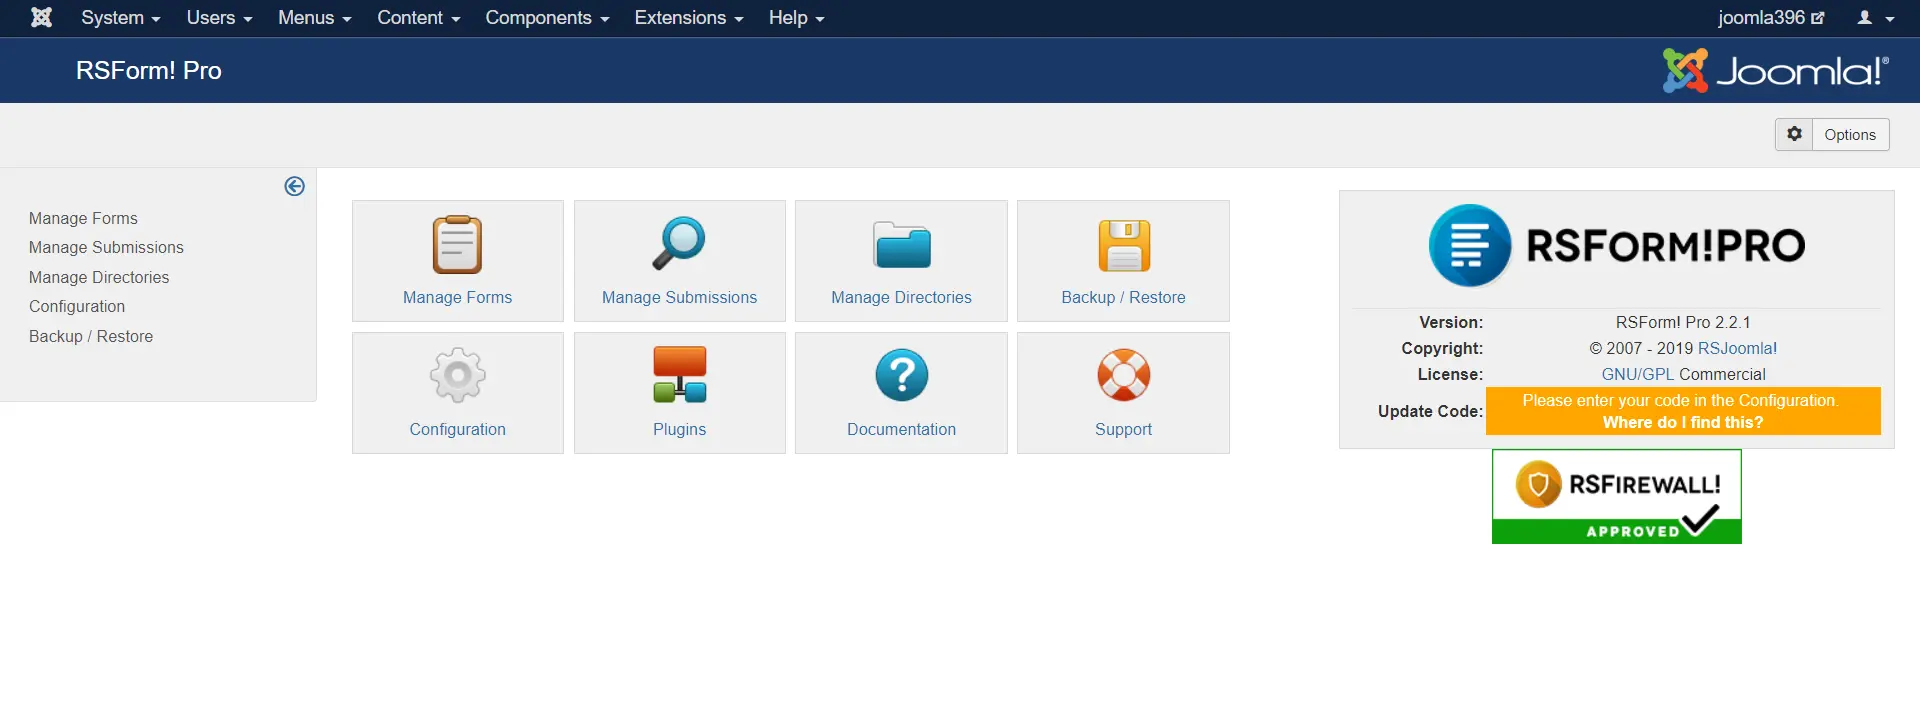
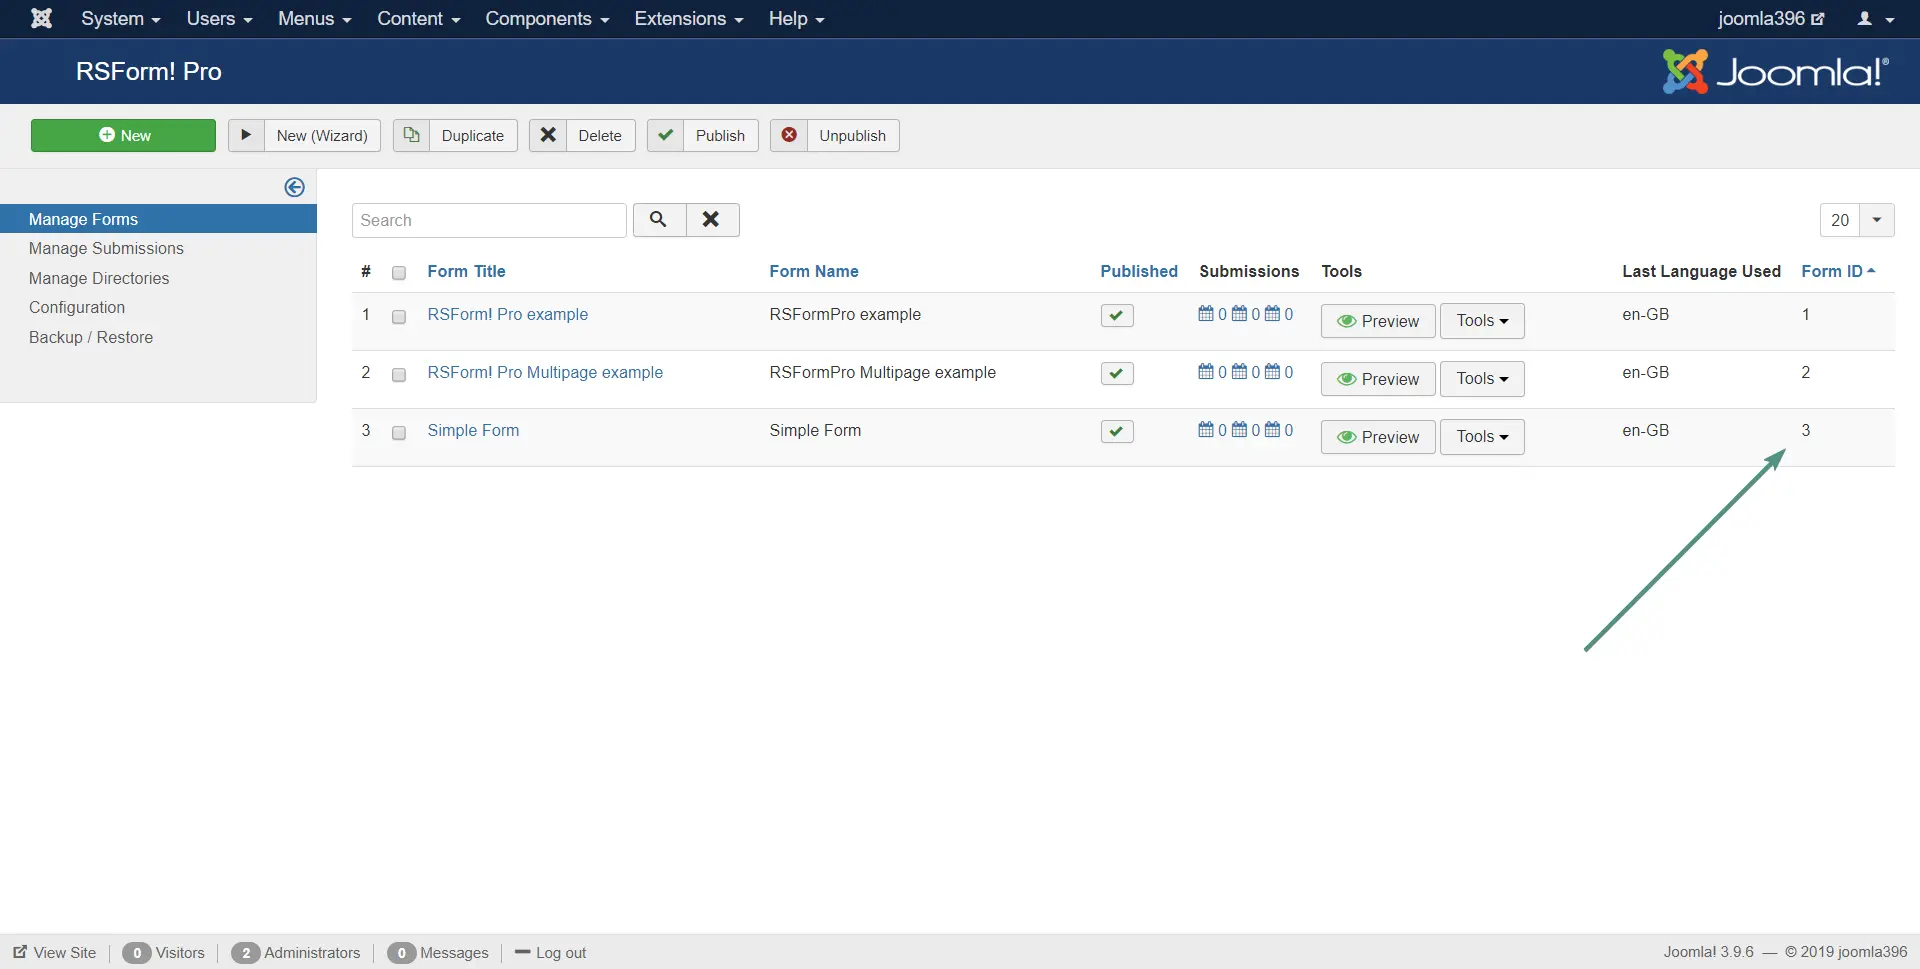
Click on Manage Forms and you will be presented with a list of forms currently stored on the site. On first installation you should see two example forms listed here.
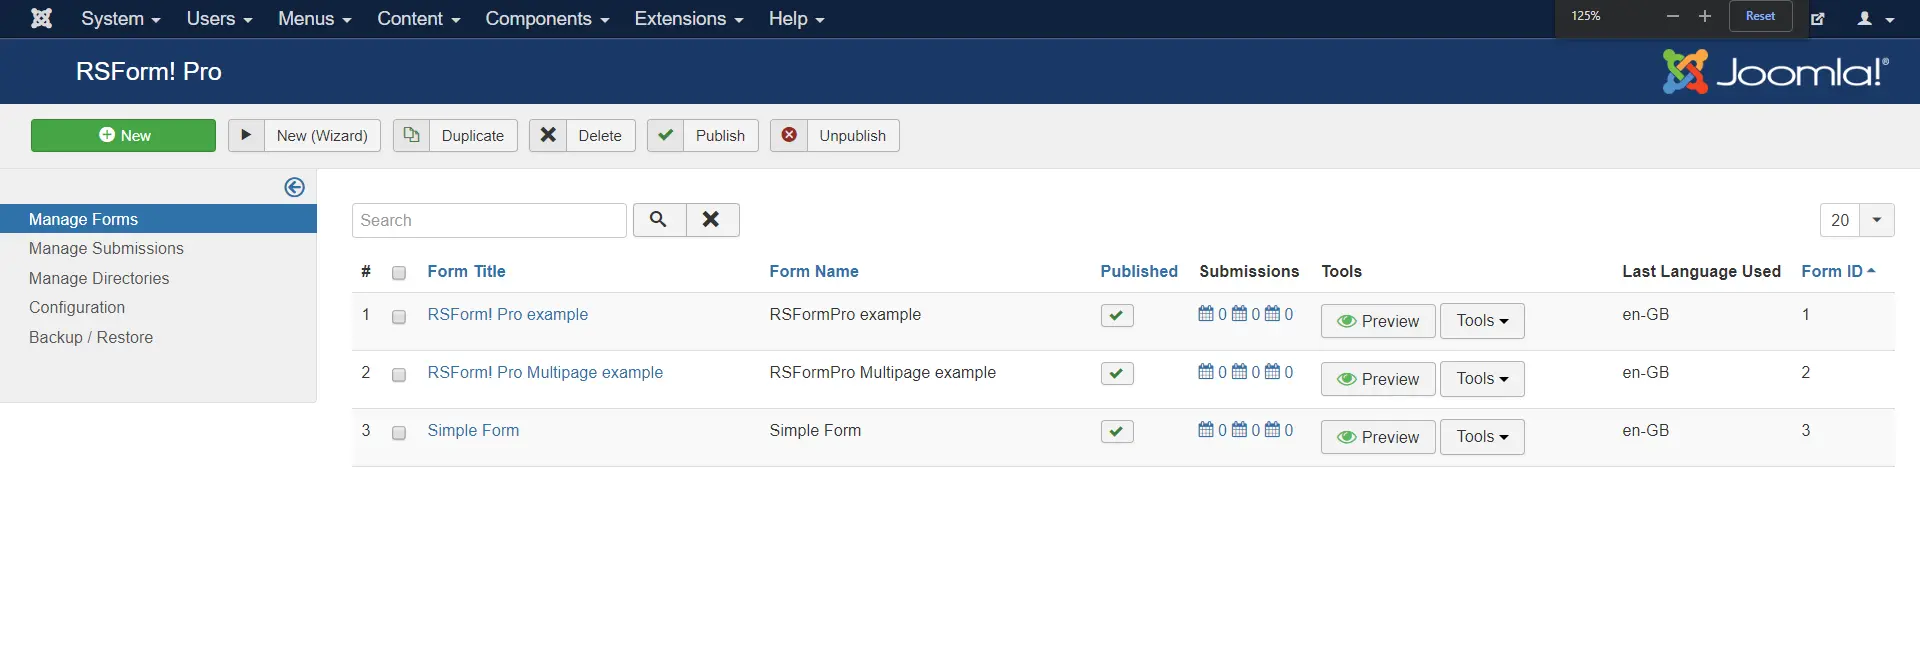
To create a new form, click on the big green New button.
Once you’ve done so, you’ll be confronted by a somewhat complicated screen. Don’t panic! … upon closer inspection, the screen is actually pretty straightforward.
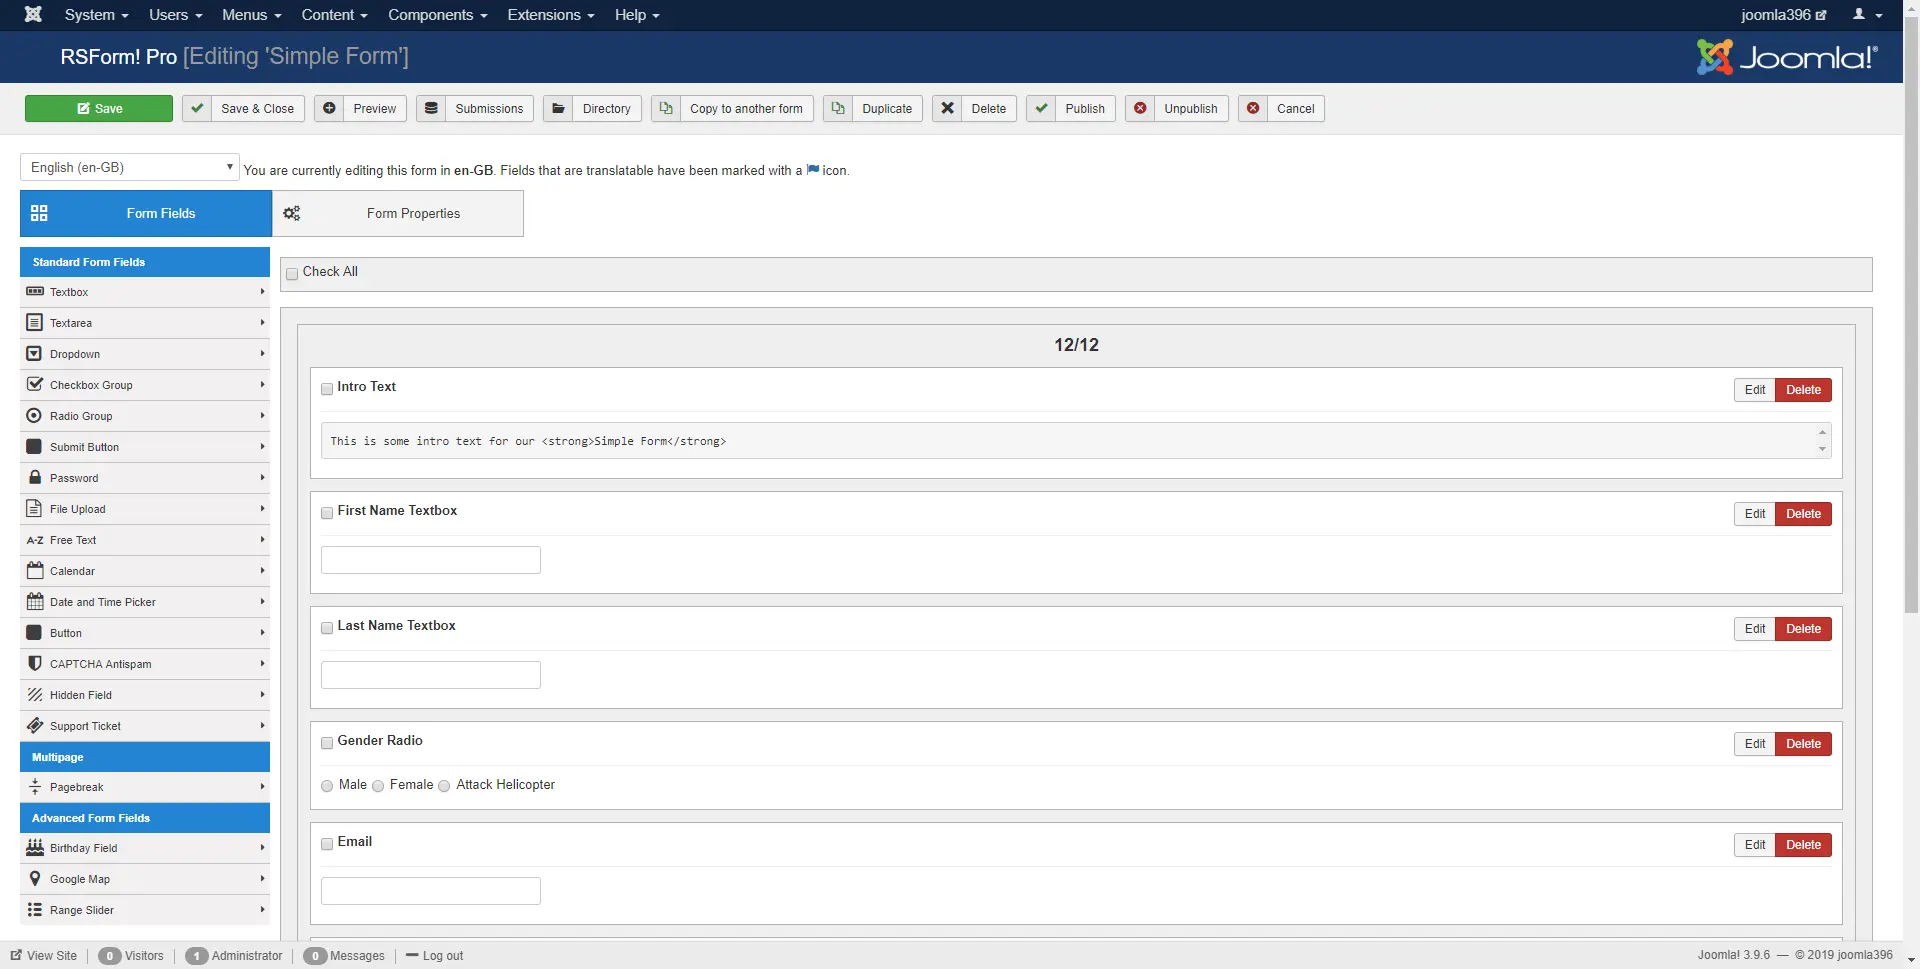
Form Fields and Form Properties
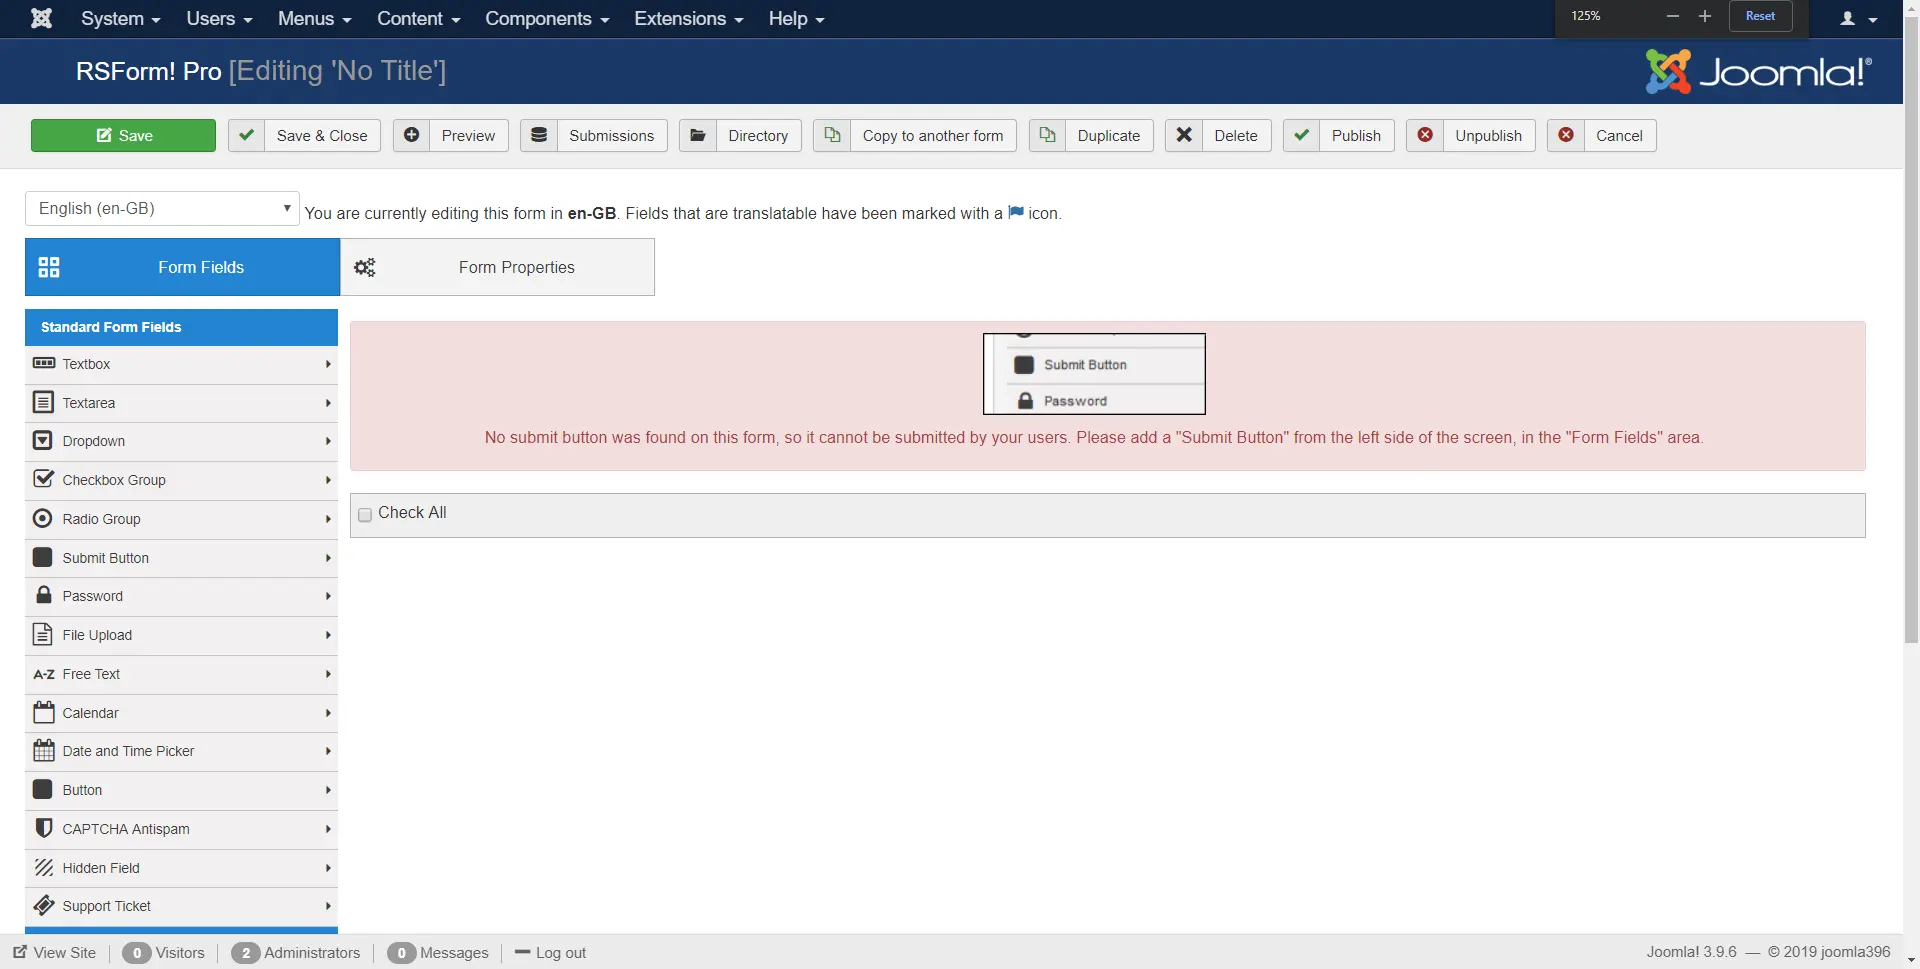
You should now see two main tabs, Form Fields and Form Properties.
Under Form Fields you can add and configure the fields that you need for your form. Common field types you might be familiar with are text boxes, dropdowns, checkboxes, radio buttons, submit buttons and date pickers.
The tab Form Properties is used to fine-tune how the form works: here you can change the name of the form, configure messages to be shown after a successful submit, add custom CSS classes, and much more. There are a lot more options for you to tweak.
It is all very versatile, and the possibilities are endless … but let’s focus on our simple form.
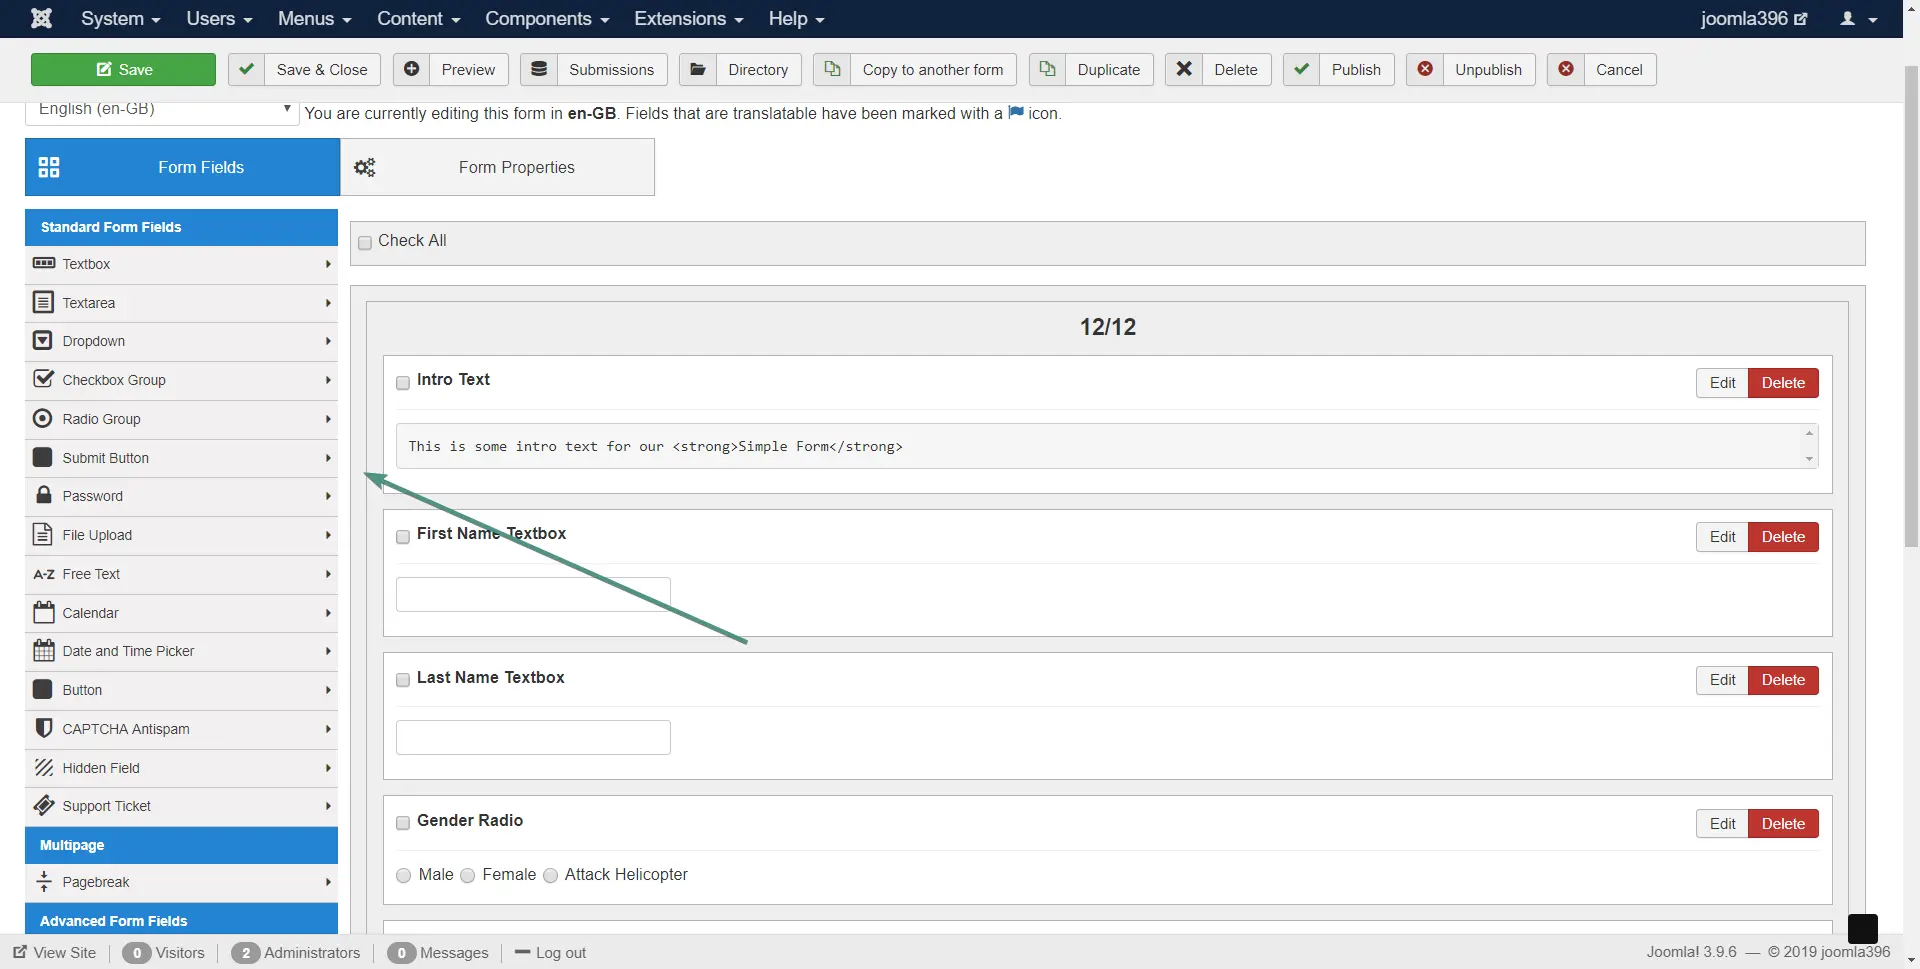
Adding fields to our form
Let’s add some fields to our form.
Go back to the Form Fields tab and click on Free Text. In the field Name enter a name that you’ll find easy to remember. This value is used within RSForm! Pro only to make it easier to know what’s what. I’ve entered some simple intro text.

Now let’s add a couple of fancier fields:

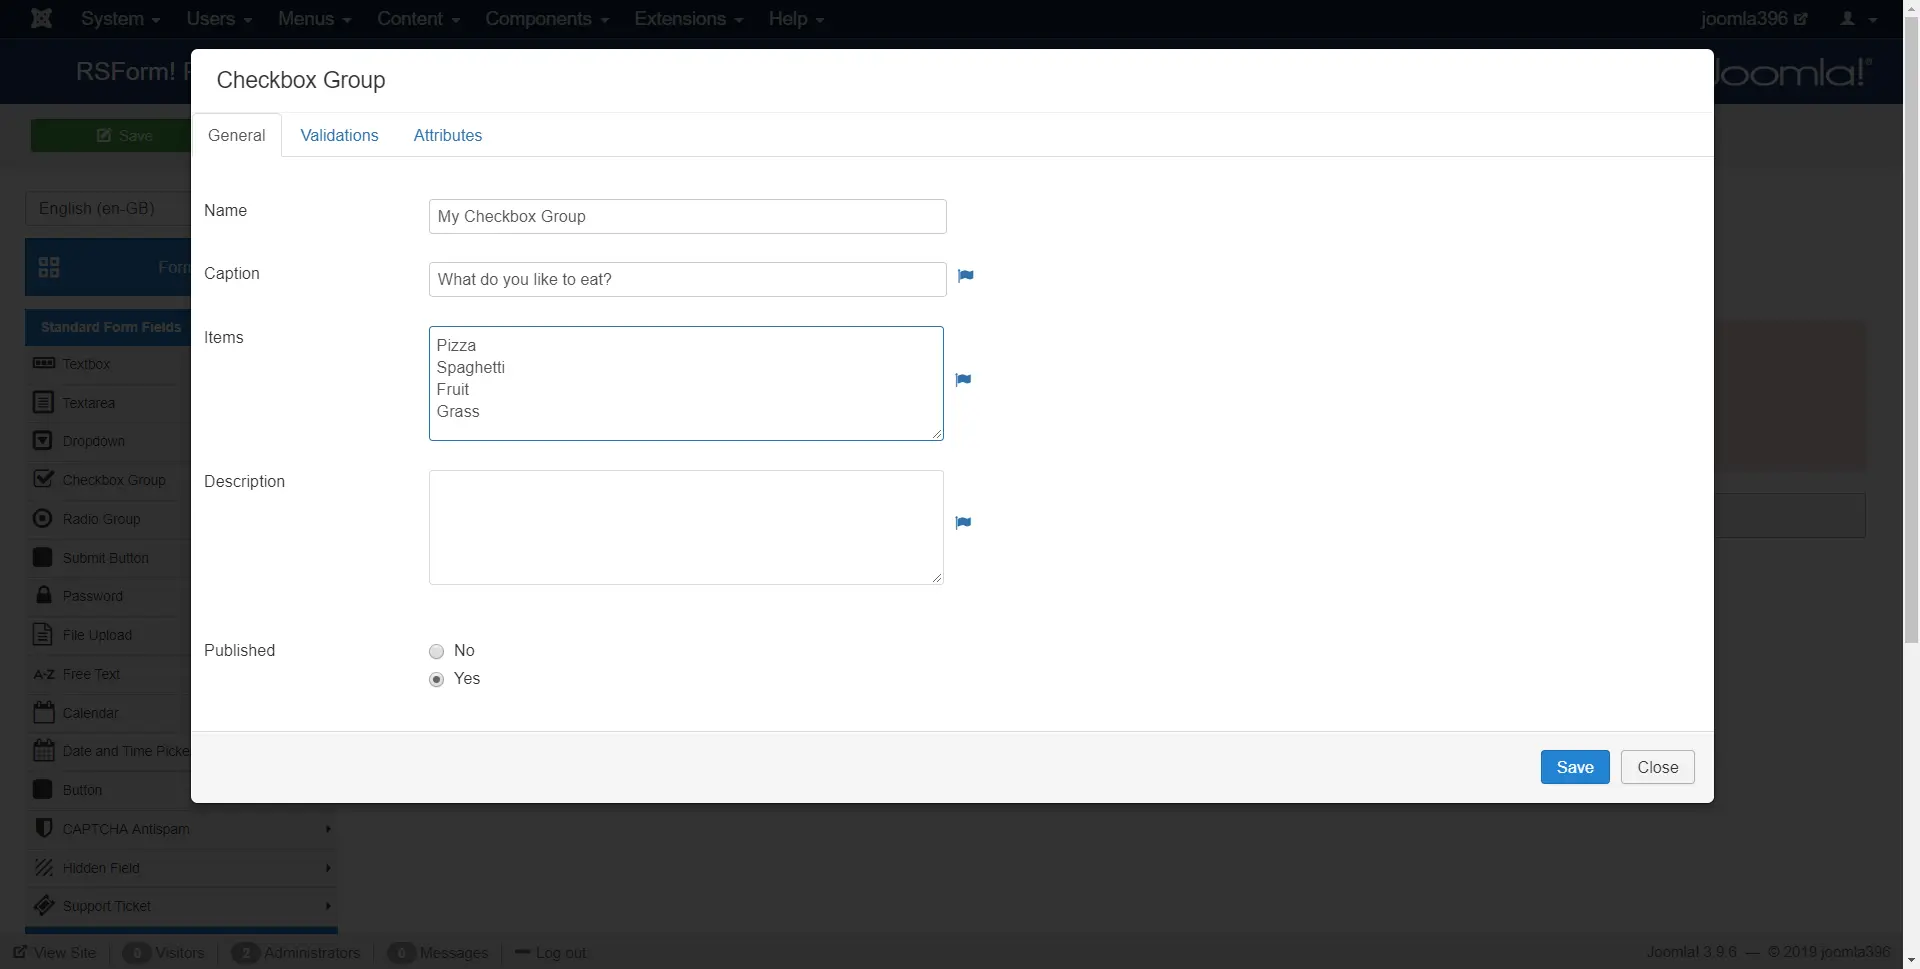
Let’s keep the momentum with some good old checkboxes:
After adding a few more fields and playing a bit with them, we need that final touch. What would a form be without a ‘SUBMIT’ button? Just a collection of fields. Let’s add a submit button and finalise our form.
After adding the button, save your work. Click Save and feel rightly proud that you have finished your first form!
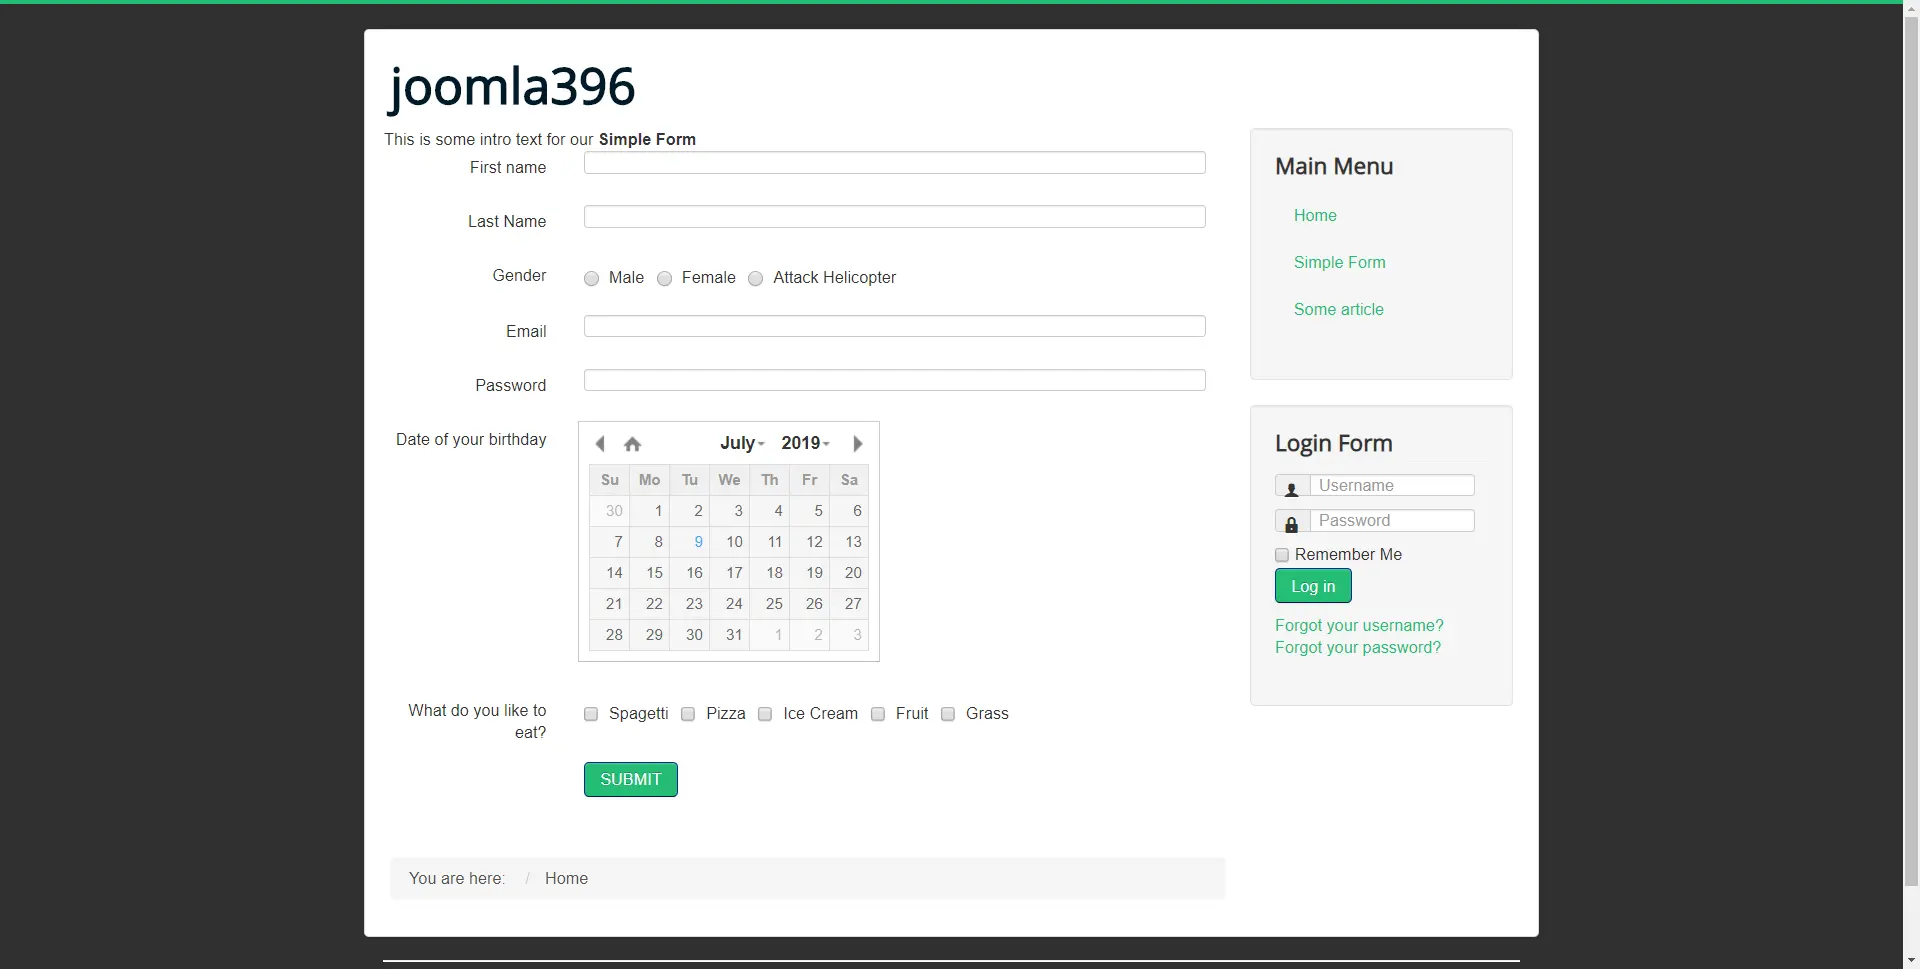
Previewing our form
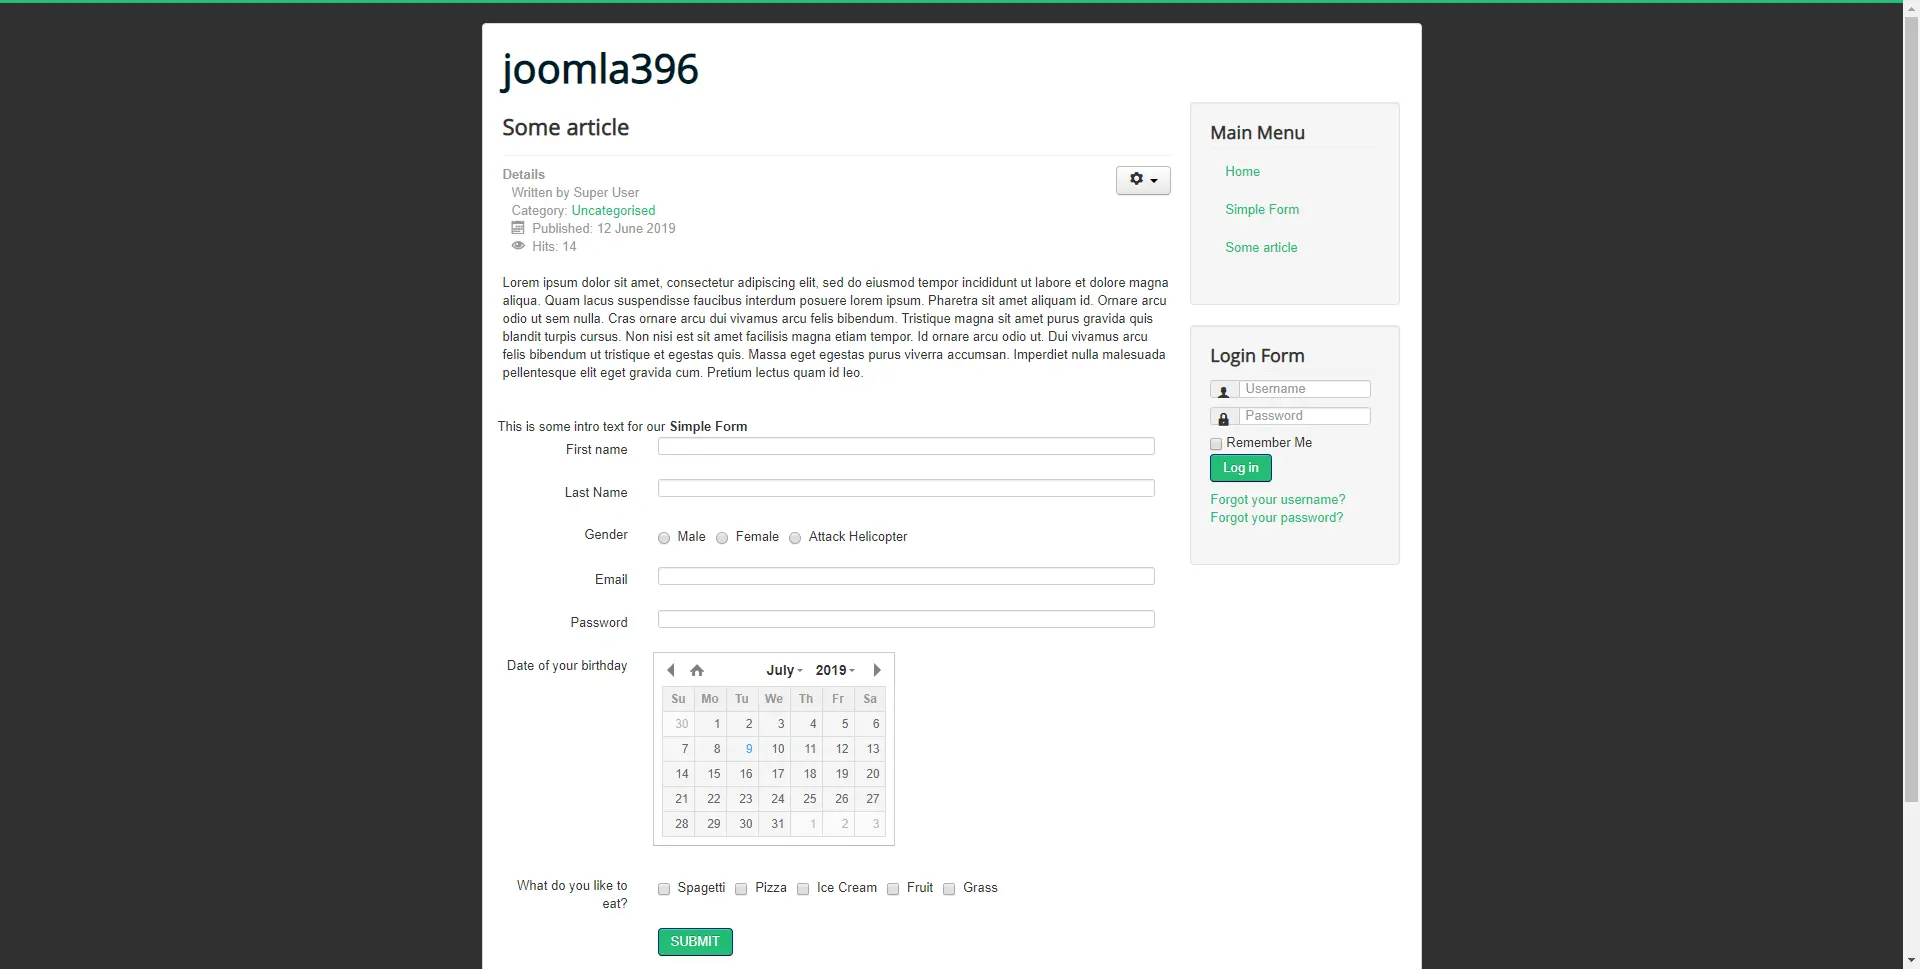
Now the form is finished, let’s take a look at what we’ve done. Click the Preview button and a new browser window will open with a previewed version of your form.
Previewing the form is a quick and easy way to check out how your form will look to the user but you’ll still need to publish the form on the website for your users to see it.
Publishing the form on your website
You’re very proud with your new form. And you should be!
There are several ways of publishing a form on your site, the easiest of which is to create a new menu item and point it at the form.
To do so, you’ll need to:
- Create a new menu item
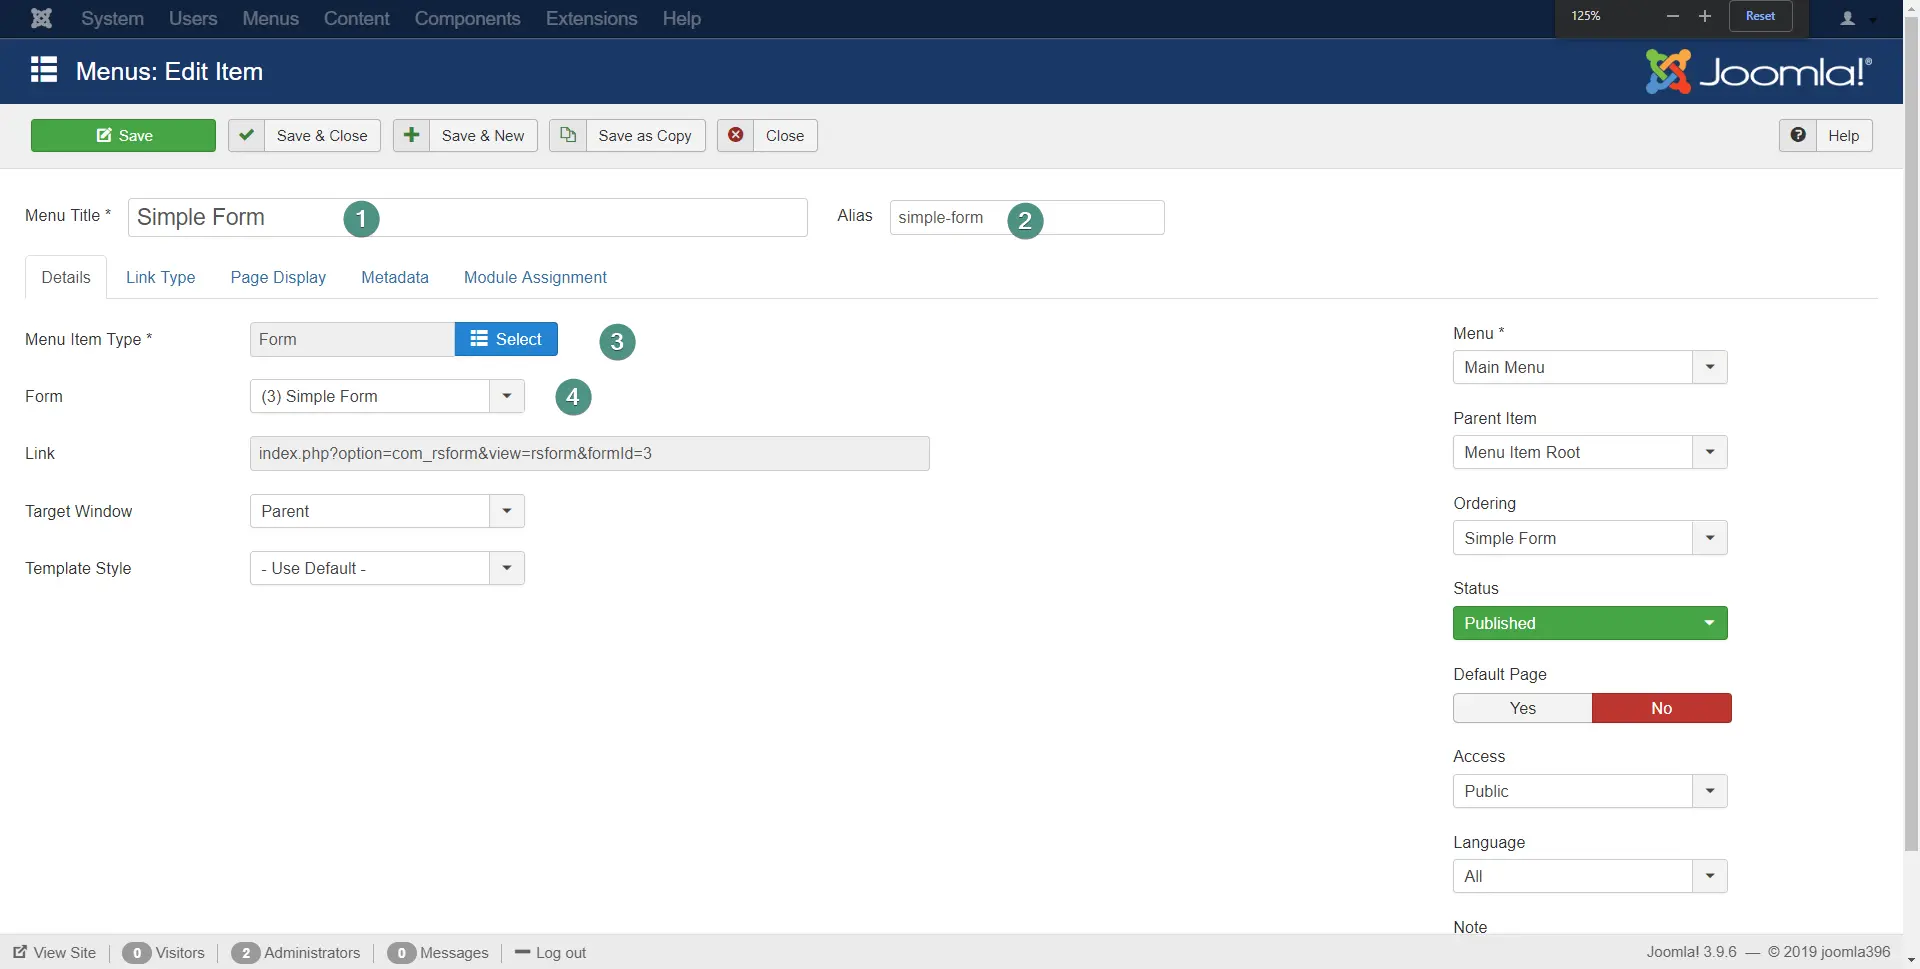
- Set it up
Add the title of your form
Add the alias (URL)
Choose ‘Form’ as the Menu Item Type
Choose your form under ‘Form’ - Save!
Congratulations, your form is now visible on your website!
Embedding the form within an existing page
- Download the RSForm!Pro Content Plugin (available on RSJoomla)
- Install it and enable the plugin (for detailed info on installing Joomla extensions, check out How to find & install a Joomla extension)
- Find the ID of your form
- Go in the article you want to embed the form in and add
{rsform id}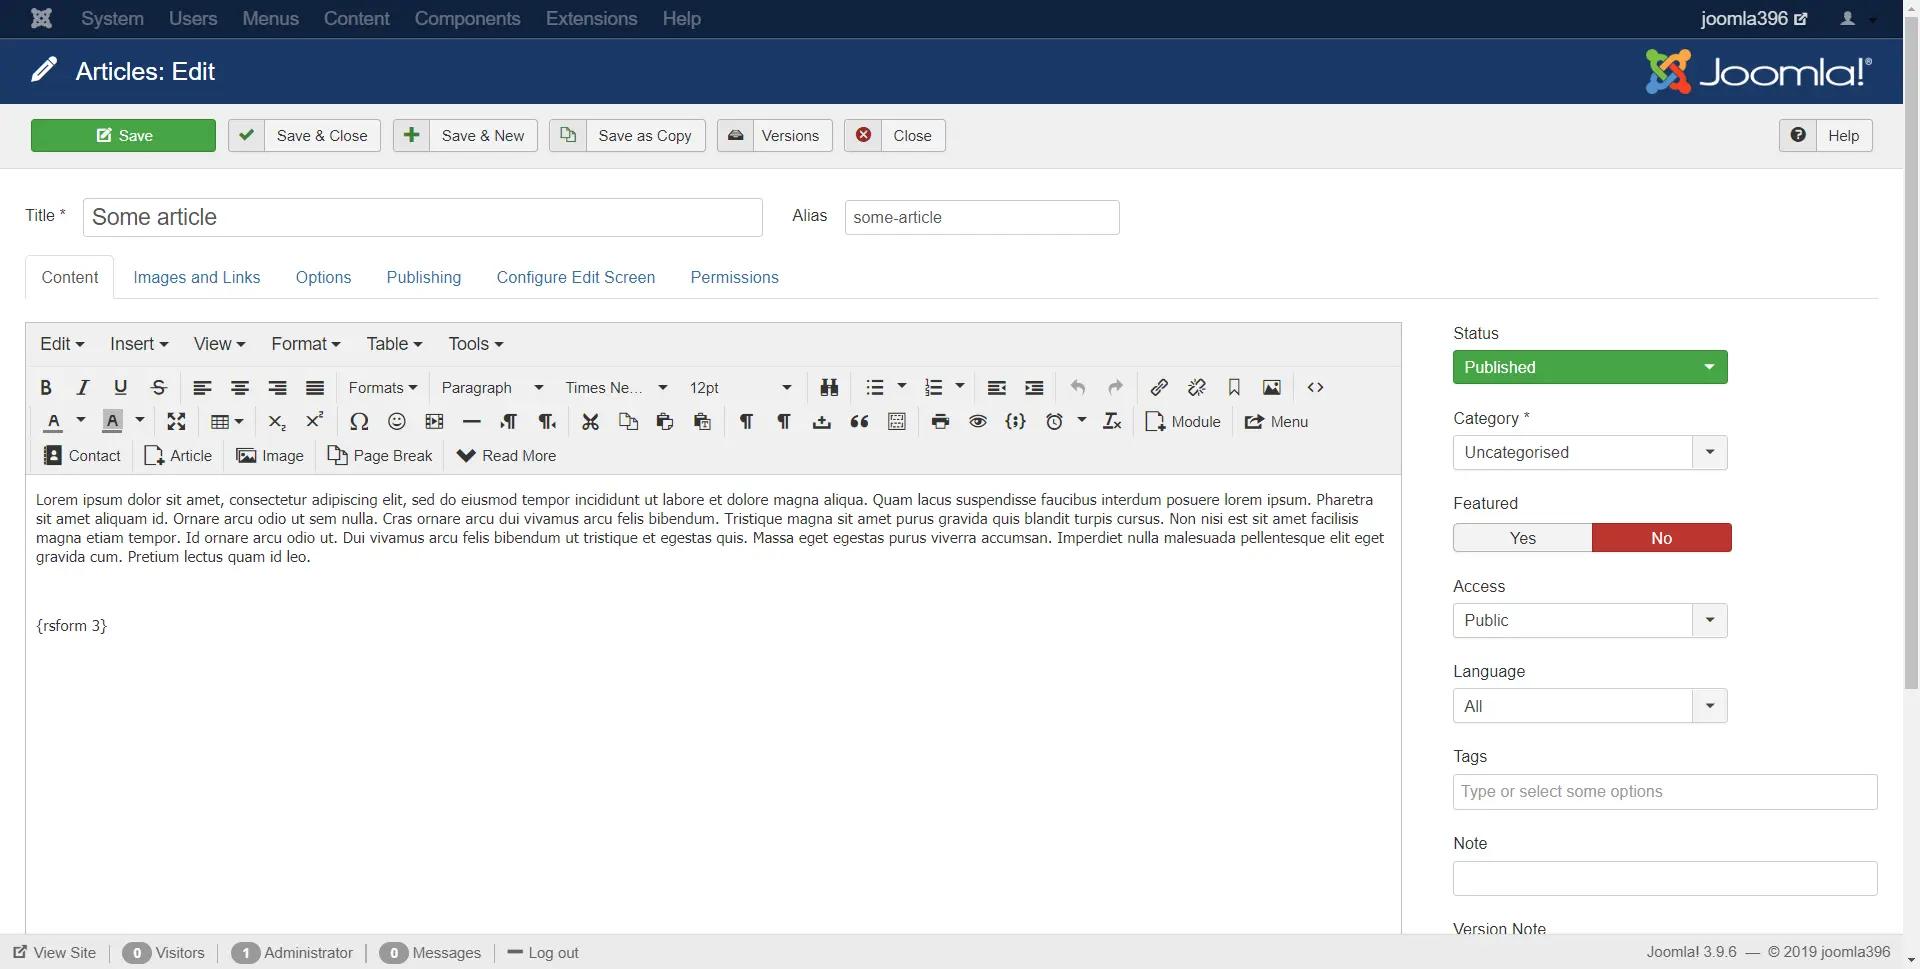
- Refresh your page and rejoice!
This was a crash course on making forms in Joomla. We encourage you to play around and bring your form game to a new level.
Forms can be tricky. Having problems with them is nothing to be ashamed about…
We are a Joomla agency and we have made various forms. If you have problems with forms, Contact us and we will help.